QuickSwap is a decentralized exchange based on Polygon, a layer 2 scaling solution and an infrastructure for Ethereum.
You can move your tokens from Ethereum to Polygon and trade on QuickSwap with very low transaction fees and at fast speeds.
In this tutorial, I will show you how to use QuickSwap and connect MetaMask to Polygon, and give you information on QuickSwap fees.
Table of Contents
Connecting MetaMask to Polygon
To use and trade on QuickSwap, you should first connect your MetaMask wallet to Polygon or use other Polygon-supported wallets.
Adding Polygon to MetaMask is very easy. First log in to your MetaMask wallet and then visit QuickSwap.
If you don’t have a MetaMask wallet yet, check out our MetaMask tutorial to learn how to set up and use MetaMask.
To add the Polygon network (Matic) to your MetaMask wallet, click the ”Switch to Matic” button on the platform.
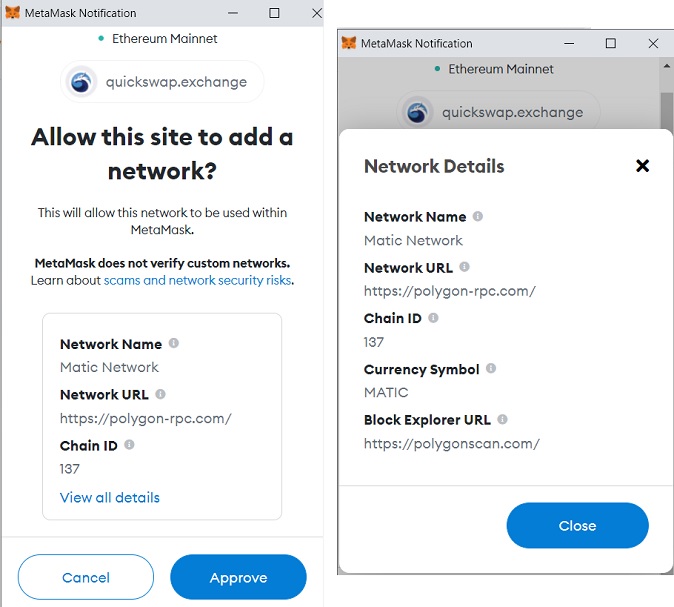
And then click the approve button on the MetaMask notification to add Matic network (Polygon) to your MetaMask wallet.
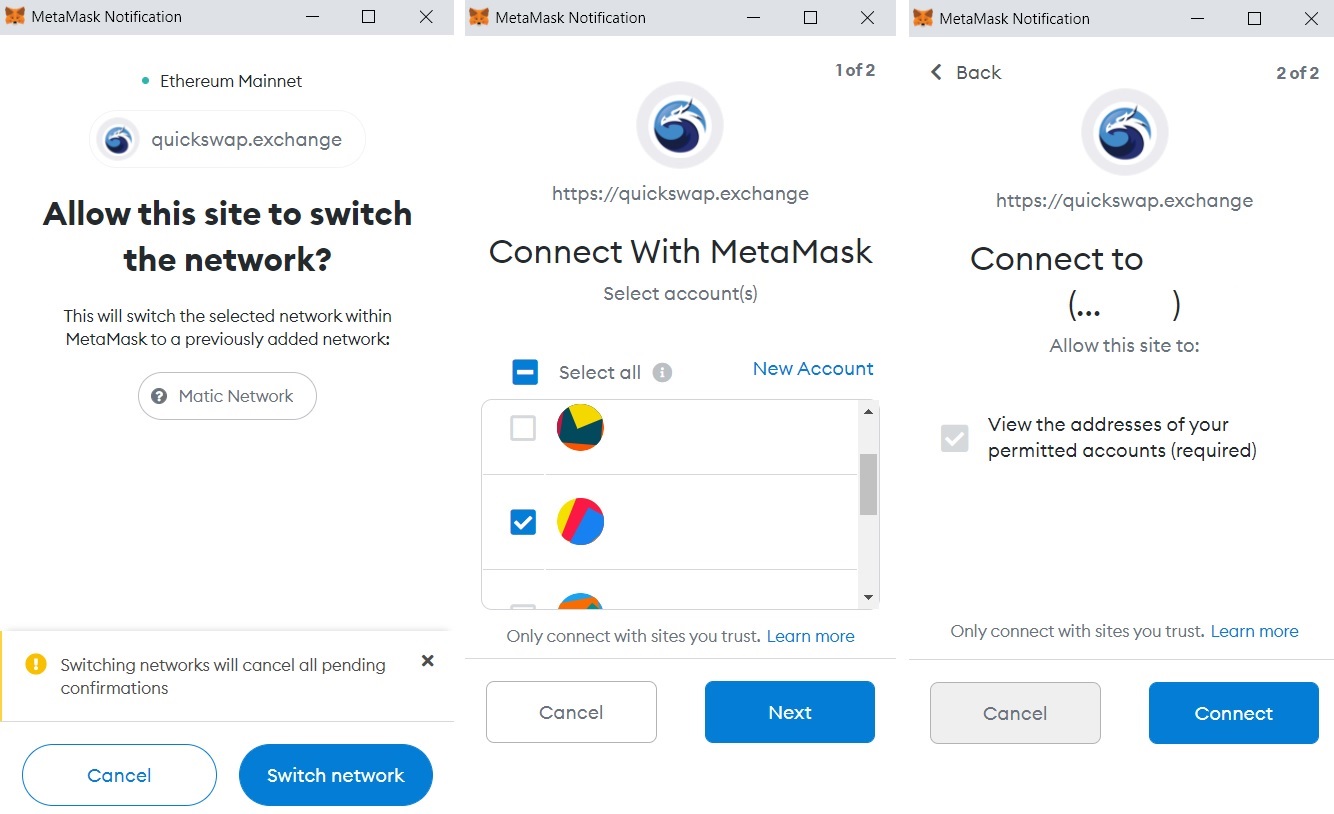
After clicking the approve button, click the ”switch network” button and then choose the account that you want to connect to QuickSwap.
You can also add the Polygon network to your MetaMask wallet manually.
To add the network to your wallet manually, first click the network you currently use on your MetaMask wallet such as ”Ethereum Mainnet”.
And then click ”Custom RPC” and add the Polygon network to your MetaMask wallet using the network details in the image above.
How to connect MetaMask to QuickSwap?
If you’ve followed the steps above and added the Polygon network to your MetaMask wallet, your MetaMask account will be connected to QuickSwap after choosing the account that you want to connect to MetaMask.
If you’ve manually added Polygon to your MetaMask wallet, first log in to your MetaMask wallet and then visit QuickSwap.
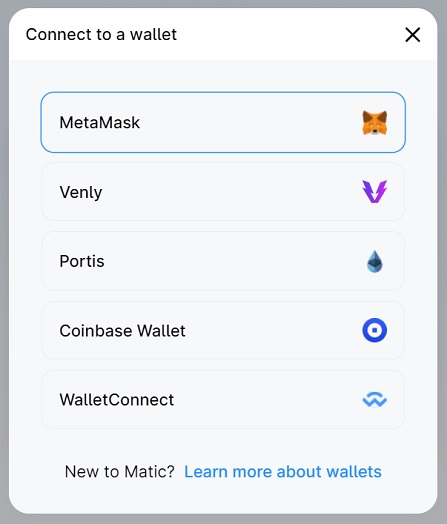
On the exchange, click the ”connect to a wallet” button and then choose MetaMask.
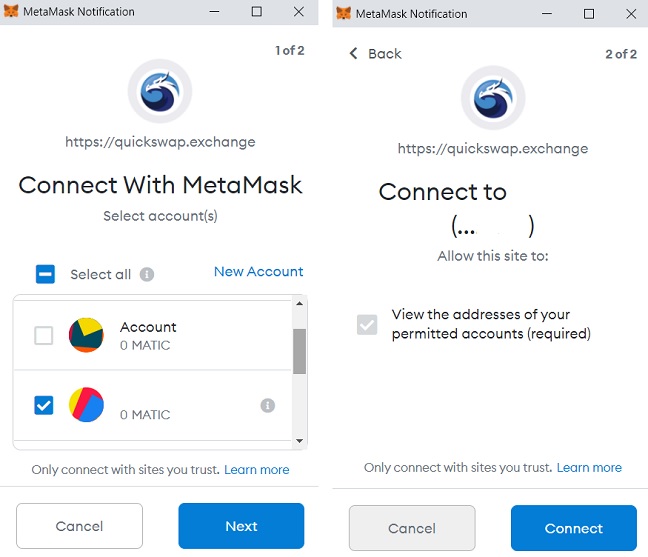
After choosing MetaMask, select the account that you want to connect to the platform on the MetaMask notification and click the ”connect” button.
How to send MATIC from Binance to MetaMask? Add MATIC to MetaMask
If you want to trade on QuickSwap, you should have some MATIC coin in your wallet and it should be on the Polygon network.
To make a swap or stake your QUICK tokens on QuickSwap, you will need MATIC coins in your wallet to pay for transaction fees.
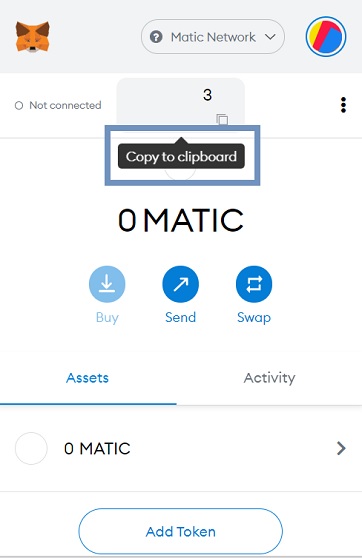
To send MATIC from Binance to your MetaMask wallet, first click the address on your MetaMask account to copy it to the clipboard.
If you don’t have a Binance account yet, you can simply click the button below or use the referral ID ”WRYOO8BZ” to open your Binance account with a 20% fee discount:
To open a Binance account with a 20% fee discount and learn how to set up 2FA and verify your identity, check out our Binance account opening tutorial.
After copying your MetaMask address, log in to your Binance account and go to the ”fiat and spot” page and click the withdraw button.
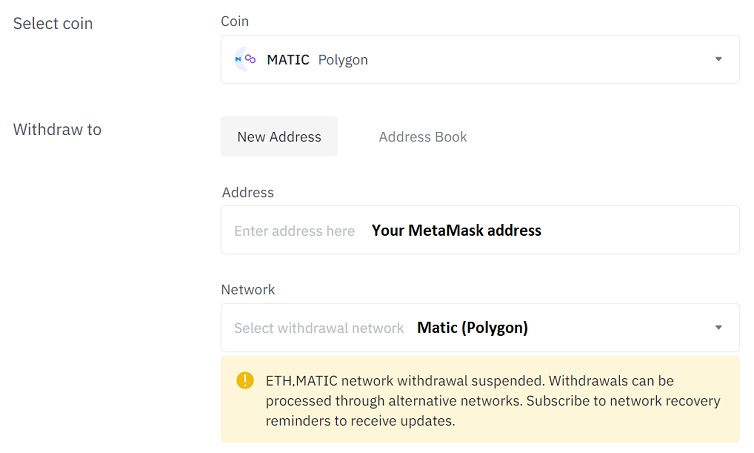
Select MATIC (Polygon) coin and enter your MetaMask address, and select MATIC network.
If the MATIC network withdrawal is suspended, you should wait for it to be resumed as you need MATIC on its main network (Polygon) to trade on QuickSwap.
You can also send MATIC from KuCoin to your MetaMask wallet.
If you have MATIC token on the Ethereum blockchain, you can also move it from Ethereum to Polygon using the Polygon Web Wallet.
But, to move MATIC and other tokens from Ethereum to Polygon, you need to pay transaction fees which could be very high most of the time.
So withdrawing MATIC from Binance or KuCoin via the MATIC (Polygon) network could be a better choice in terms of fees.
When you send MATIC coins to your MetaMask wallet, they will automatically appear on your MetaMask wallet if you’ve added the Polygon network to your wallet.
But, for tokens on the Polygon network, you may need to add custom token to see them on your MetaMask wallet.
You can check out this page and copy the contract address of the token that you sent to your MetaMask wallet through MATIC after clicking the token.
To add custom token on MetaMask, click the ”add token” button on MetaMask and then enter the contract address of the token that you want to add to your MetaMask wallet.
QuickSwap fees
QuickSwap has a trading fee of 0.30%. When you make a swap on QuickSwap, you’ll be charged a 0.30% flat trading fee regardless of your trade size and the pair.
Besides, there are transaction fees you need to pay when approving a token and making a swap on QuickSwap, which are extremely low thanks to Polygon.
How to trade on QuickSwap with MetaMask?
Once you have MATIC in your MetaMask wallet and have connected your wallet to QuickSwap, you can start trading on QuickSwap.
Let’s say you have WETH on the Polygon network and want to swap it to MATIC. First visit QuickSwap and connect your wallet to the platform.
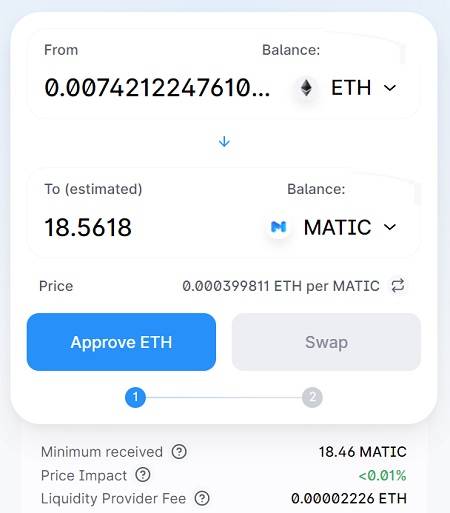
Select ETH in the from field and select MATIC in the ”to” field, and enter the amount of ETH you want to sell.
If you’ve not approved ETH or any other token that you want to sell on QuickSwap before, you should first click the ”approve” button and allow the smart contract to use your token.
After clicking the approve button, confirm the transaction on the MetaMask notification which will only incur a very small transaction fee.
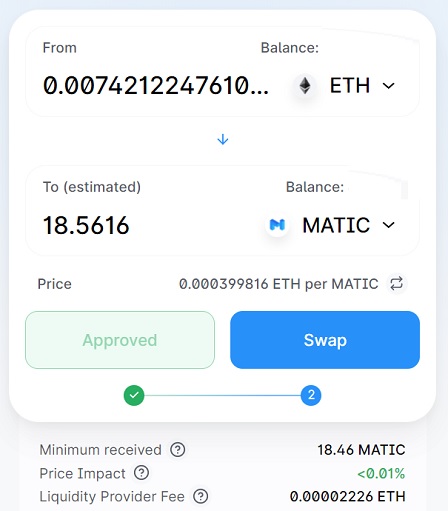
Once the token approval is done, click the ”swap” button.
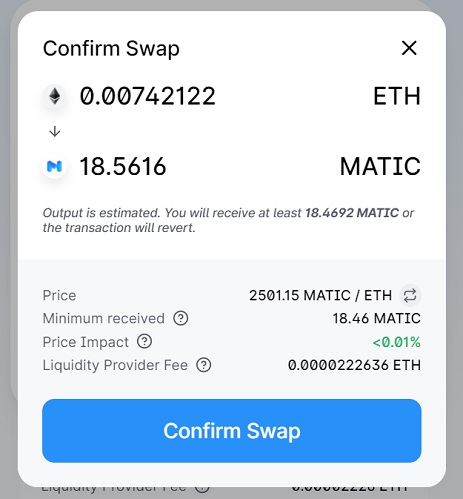
After clicking the swap button, review your trade and click the ”confirm swap” button.
You should again confirm the transaction on the MetaMask notification after clicking the confirm swap button.
The swap will be completed in a very short time with very low transaction fees and you’ll receive MATIC coin or tokens in your wallet.
You can also check your address on PolygonScan and view all the transactions you’ve done and your MATIC and token balances.
How to stake QUICK token?
You can stake your QUICK tokens in the Dragon’s Lair on QuickSwap and earn swap fees coming from the exchange.
If you have MATIC or any other token on your wallet, you can first swap it to QUICK on QuickSwap.
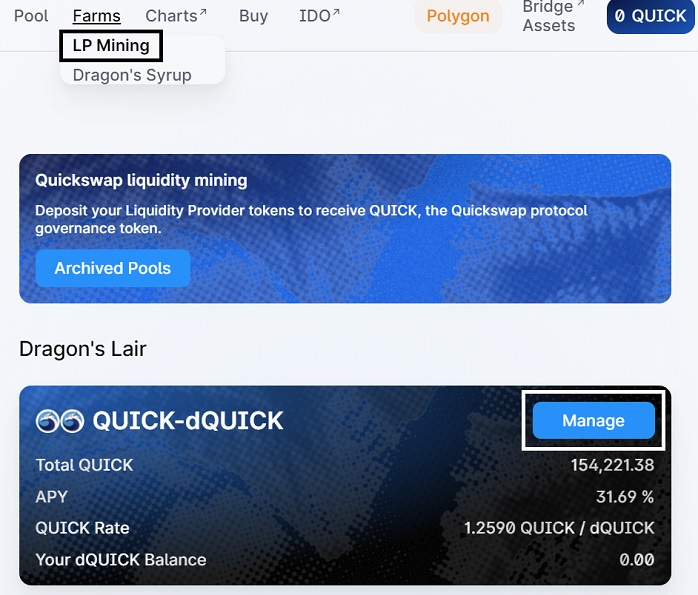
To stake QUICK, first click ”LP Mining” under the farms menu and then click the ”manage” button.
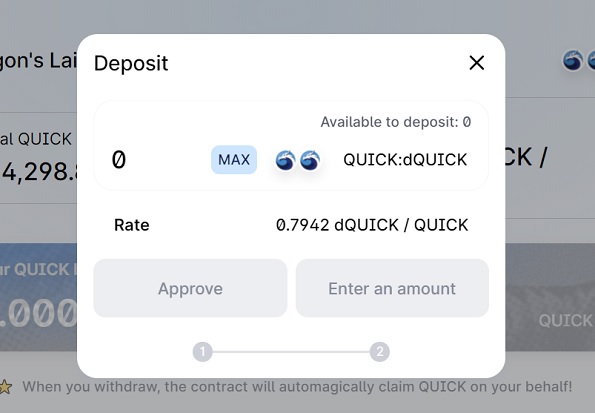
Click the ”deposit” button to deposit QUICK tokens into the Dragon’s Lair.
Enter the amount of QUICK that you want to deposit and approve the token. After approving the token, you can stake your QUICK tokens.
After you stake your QUICK tokens in the Dragon’s Lair, you’ll receive dQUICK tokens.
When you unstake/withdraw, dQUICK tokens will be burned and you’ll receive more QUICK tokens.
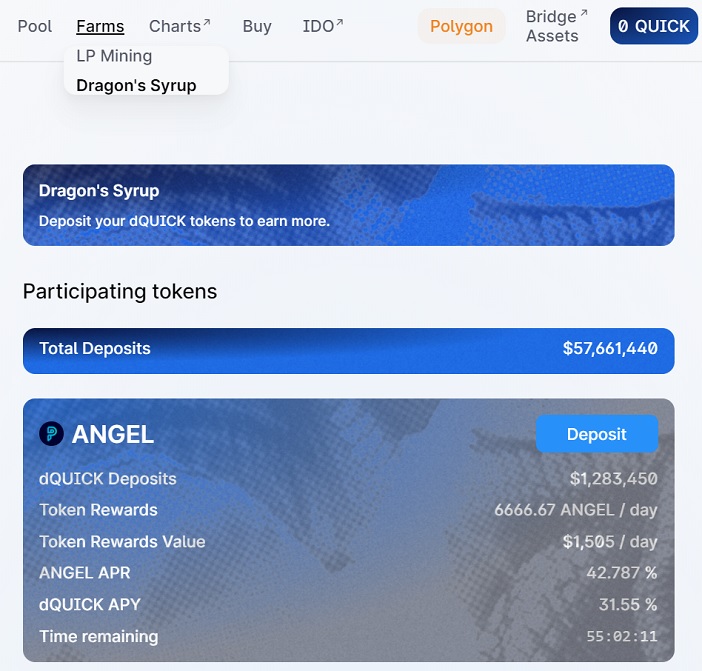
You can also stake your dQUICK tokens in any of Dragon’s Syrup pools and earn different tokens in addition to your QUICK earnings.
If you want to unstake/withdraw your QUICK tokens, you should first unstake your dQUICK tokens from the Dragon’s Syrup pool.
How to add liquidity to QuickSwap?
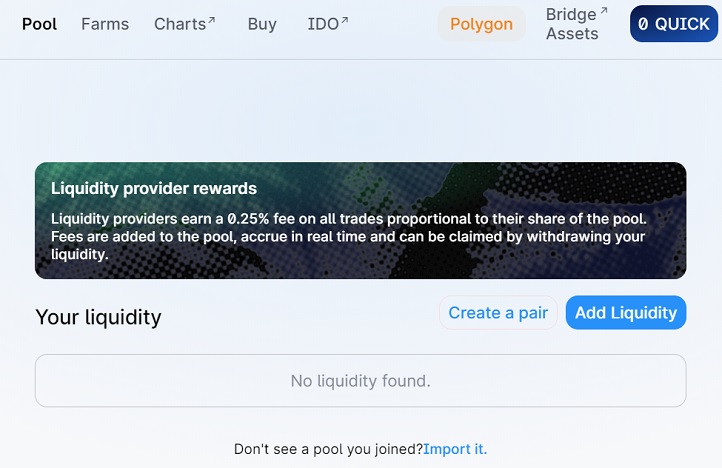
You can add liquidity to QuickSwap and earn trading fees that come from swaps made on the platform.
Also, you can participate in farming by staking your LP tokens and earn QUICK tokens in addition to trading fees.
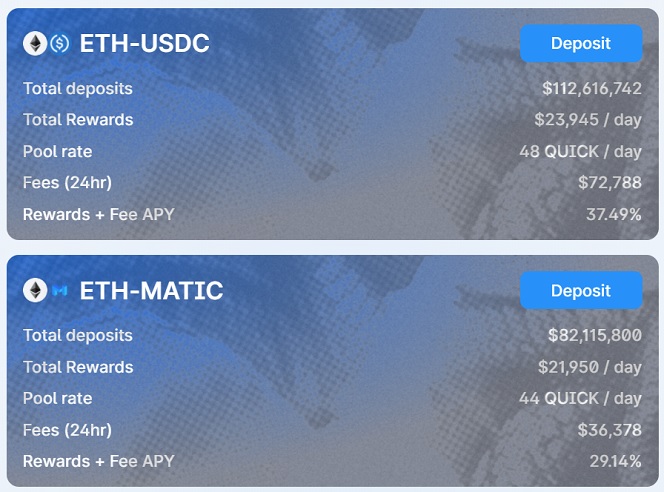
Before adding liquidity to QuickSwap, first click ”LP Mining” under the farms menu to check which pools are included in the farming program.
After deciding on the pair that you will add liquidity to, click the ”pool” tab on QuickSwap and then click the ”add liquidity” button.
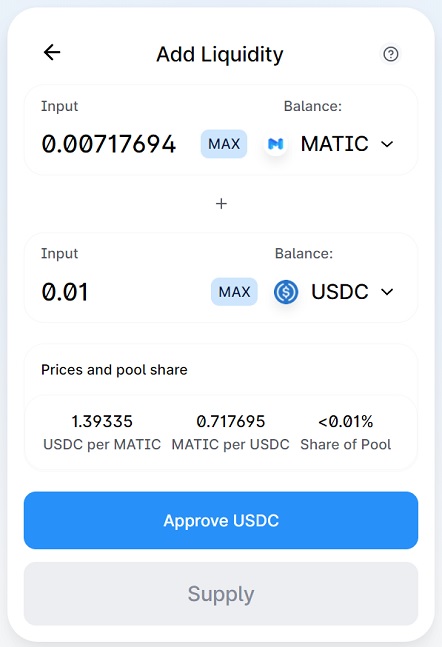
After clicking the add liquidity button, select the token pair and enter the amount for one of the tokens.
After entering the amount for one token, the required amount for the other token will be automatically calculated.
You can then approve both tokens and click the supply button to add liquidity to the pair.
After adding liquidity to a pair included in the LP mining program, click ”LP Mining” under the farms menu and click the deposit button on your pair to stake your LP tokens.
How to move tokens from Polygon to Ethereum?
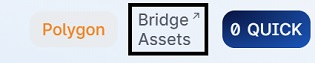
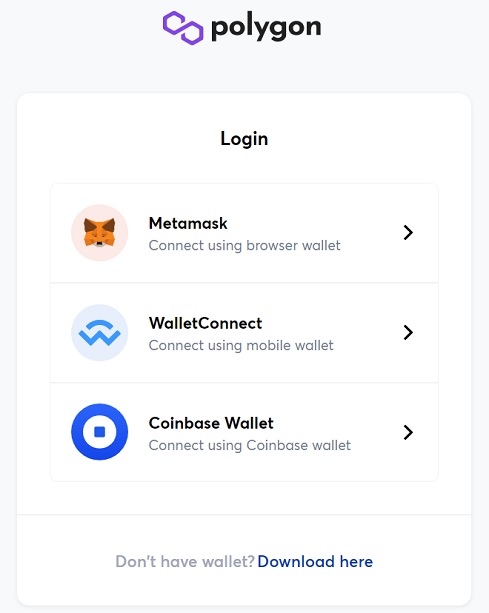
If you want to move tokens from Polygon to Ethereum or from Ethereum to Polygon, first click ”Bridge Assets” on QuickSwap.
On the Polygon Web Wallet, click ”MetaMask” to connect your wallet to the Polygon Web Wallet. But, before that, you should switch to either Ethereum or MATIC network in your MetaMask wallet.
If you want to move tokens from Polygon to Ethereum, switch to MATIC network in your MetaMask wallet and then connect your wallet to the Polygon Web Wallet.
After connecting your MetaMask wallet to the Polygon Web Wallet, click the ”move funds from Ethereum to Polygon” button on the platform.
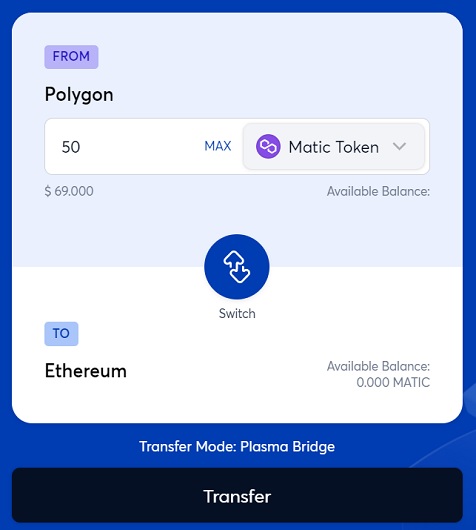
For example, you can move MATIC from the Polygon Network to Ethereum by making a transfer like the one below.
Or you can click the switch button and move your assets from Ethereum to Polygon instead. You’ll be first requested to switch to the Ethereum network via the MetaMask notification.
After selecting the token that you want to move to Polygon or Ethereum and entering the amount, click the transfer button.
You can view the transaction fees and review your order, and confirm your transaction on MetaMask after clicking the continue buttons.
To learn how to use PancakeSwap and Binance, check out the tutorials below:

 And then click the approve button on the MetaMask notification to add Matic network (Polygon) to your MetaMask wallet.